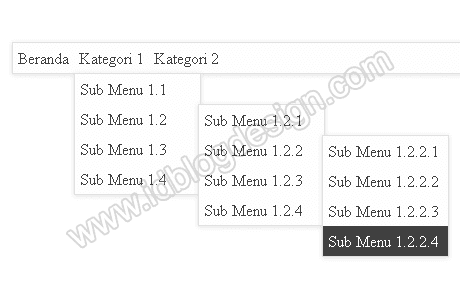
 Preview Dropdown Menu Blogger
Demo:
http://demodropdownmenu-idblogdesign.blogspot.com/
Ok just next to the steps:
Log in to your blogger account.
Go to the Layout menu and Add gadgets to the position you want (ex: main wrapper, crosscol-wrapper, or other.)
Choose HTML / JavaScript and enter the following script code in it:
<style>
.clear{clear:both}
.navigasi{position:relative;background:#fefefe;box-shadow:0 1px 4px #e0e0e0;-webkit-box-shadow:0 1px 4px #e0e0e0;-moz-box-shadow:0 1px 4px #e0e0e0;border:1px solid #e0e0e0}
.navigasi ul{margin:0;padding:0}
.navigasi ul li{float:left;list-style:none;position:relative}
.navigasi ul li a{display:block;color:#404040;text-decoration:none;padding:5px}
.navigasi ul li a:hover{background:#404040;color:#fefefe}
.navigasi ul li ul{position:absolute;display:none;width:150px;background:#fefefe;box-shadow:0 1px 4px #e0e0e0;-webkit-box-shadow:0 1px 4px #e0e0e0;-moz-box-shadow:0 1px 4px #e0e0e0;border:1px solid #e0e0e0;margin:0 auto}
.navigasi ul ul ul{display:none;position:absolute;right:-150px;top:0}
.navigasi ul li:hover > ul,.navigasi ul ul li:hover > ul{display:block}
.navigasi ul li.clear,.navigasi ul ul li{float:none}
</style>
<nav class="navigasi">
 <ul>
  <li><a href="#">Beranda</a></li>
  <li><a href="#">Kategori 1</a>
   <ul>
    <li><a href="#">Sub Menu 1.1</a></li>
    <li><a href="#">Sub Menu 1.2</a>
     <ul>
      <li><a href="#">Sub Menu 1.2.1</a></li>
      <li><a href="#">Sub Menu 1.2.2</a>
       <ul>
        <li><a href="#">Sub Menu 1.2.2.1</a></li>
        <li><a href="#">Sub Menu 1.2.2.2</a></li>
        <li><a href="#">Sub Menu 1.2.2.3</a></li>
        <li><a href="#">Sub Menu 1.2.2.4</a></li>
       </ul>
      </li>
      <li><a href="#">Sub Menu 1.2.3</a></li>
      <li><a href="#">Sub Menu 1.2.4</a></li>
     </ul>
    </li>
    <li><a href="#">Sub Menu 1.3</a></li>
    <li><a href="#">Sub Menu 1.4</a>
     <ul>
      <li><a href="#">Sub Menu 1.4.1</a></li>
      <li><a href="#">Sub Menu 1.4.2</a></li>
      <li><a href="#">Sub Menu 1.4.3</a></li>
      <li><a href="#">Sub Menu 1.4.4</a></li>
     </ul>
    </li>
   </ul>
  </li>
  <li><a href="#">Kategori 2</a>
   <ul>
    <li><a href="#">Sub Menu 2.1</a></li>
    <li><a href="#">Sub Menu 2.2</a></li>
    <li><a href="#">Sub Menu 2.3</a></li>
   </ul>
  </li>
  <li class="clear"></li>
 </ul>
</nav>
Before you store gadgets or code Drop Down Menu in Blogger, adjust color-coded red and green above the first. The color red, please replace the link or url. As for the green code that you can replace with the page title, url title or other information.
Css and html code or the amount of Drop Down above url you can modify according to your creations each and keep in mind that the results of use of the above code may be different on every blog template you have used. Good luck ...


